
The Algorithm of Auto-Layout for Unit Visualization
What is unit visualization?
Unit visualization is a technique used to efficiently arrange and display individual data units. It is widely used in data visualization, such as in heatmaps, scatter plots, and tree maps.
Here is an example of unit visualization for Gun Deaths in America:

Unit Visualization Example
A more complex example is the video below, which is a visualization for World War II.
Problem definition: the goal of auto-layout algorithm
The naive definition
Now, let's define the problem more formally.
- We have a box with a fixed size width and height .
- We want to put data points (units) into this box.
- We want there are gaps between units. Since we don't know the width and height of the units, so we identify the gap as ratio and to the width and height of the box. Therefore, and . where and are the width and height of the units.
- We want to calculate the width and height of the units so that the units fill the entire box, with the outermost units touching the edges of the box, and only allowing the last column of units to be incomplete.
For example, the following figure shows the problem when , , , , and . The algorithm should calculate the width and height of the units so that we can get the following visualization.
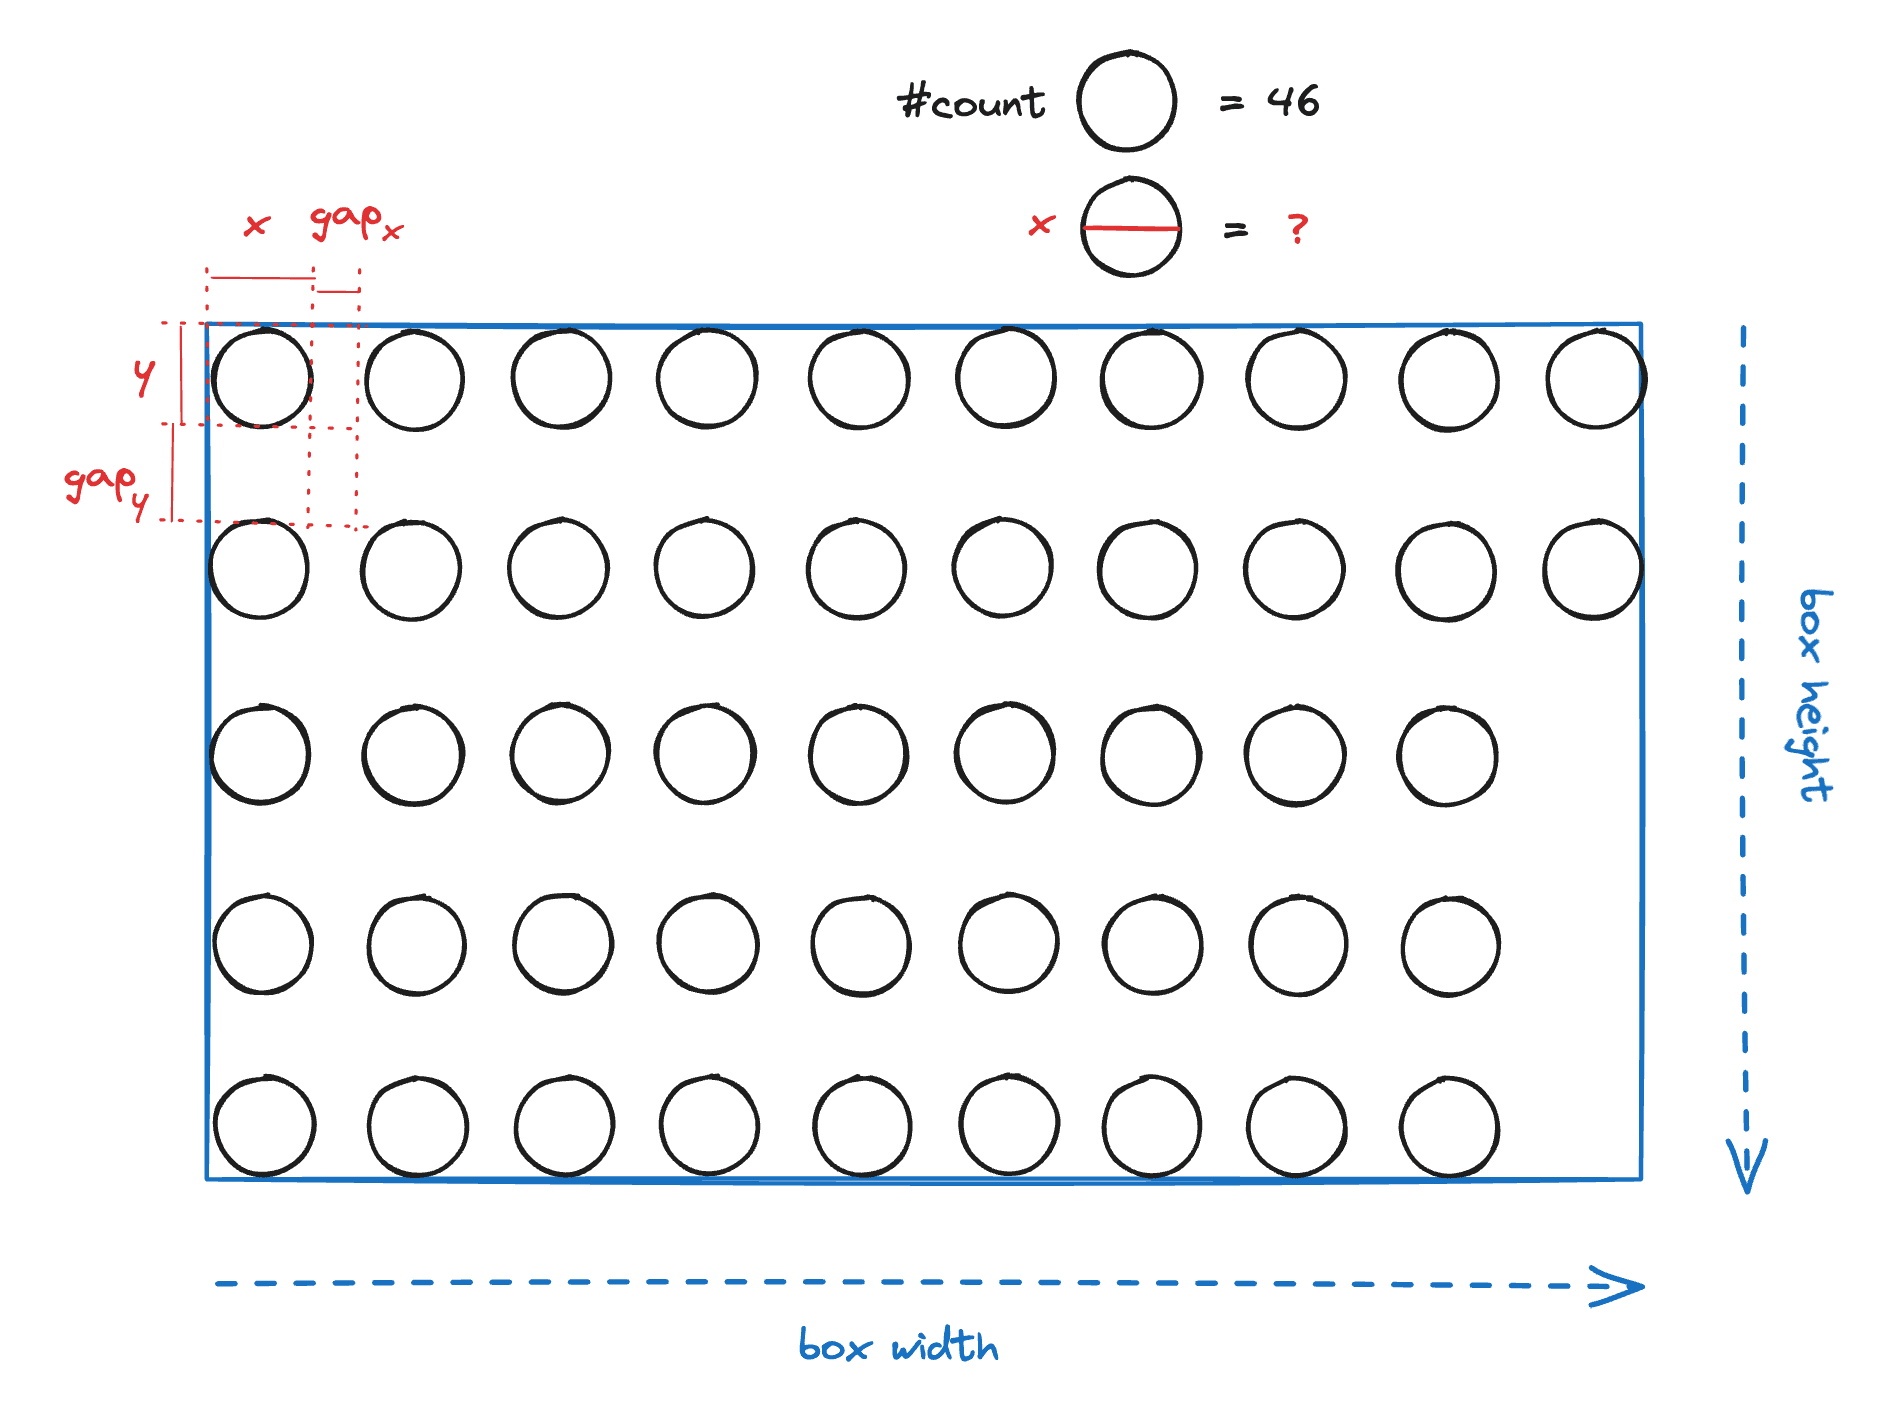
Problem Definition
Fix the naive definition
However, do you believe the previous problem always has a solution? The answer is no. Because if we make the width of the box a little bit larger, but not large enough to put another unit, then the will not be exactly .
Therefore, we need to introduce a new variable called , which is the additional horizontal space between two units. Then we can make sure the problem always has a solution. And the final point of the problem definition becomes:
We want to calculate the width and height of the units so that the units fill the entire box with . The outermost units should touch the edges of the box. And we only allow the last column of units to be incomplete.
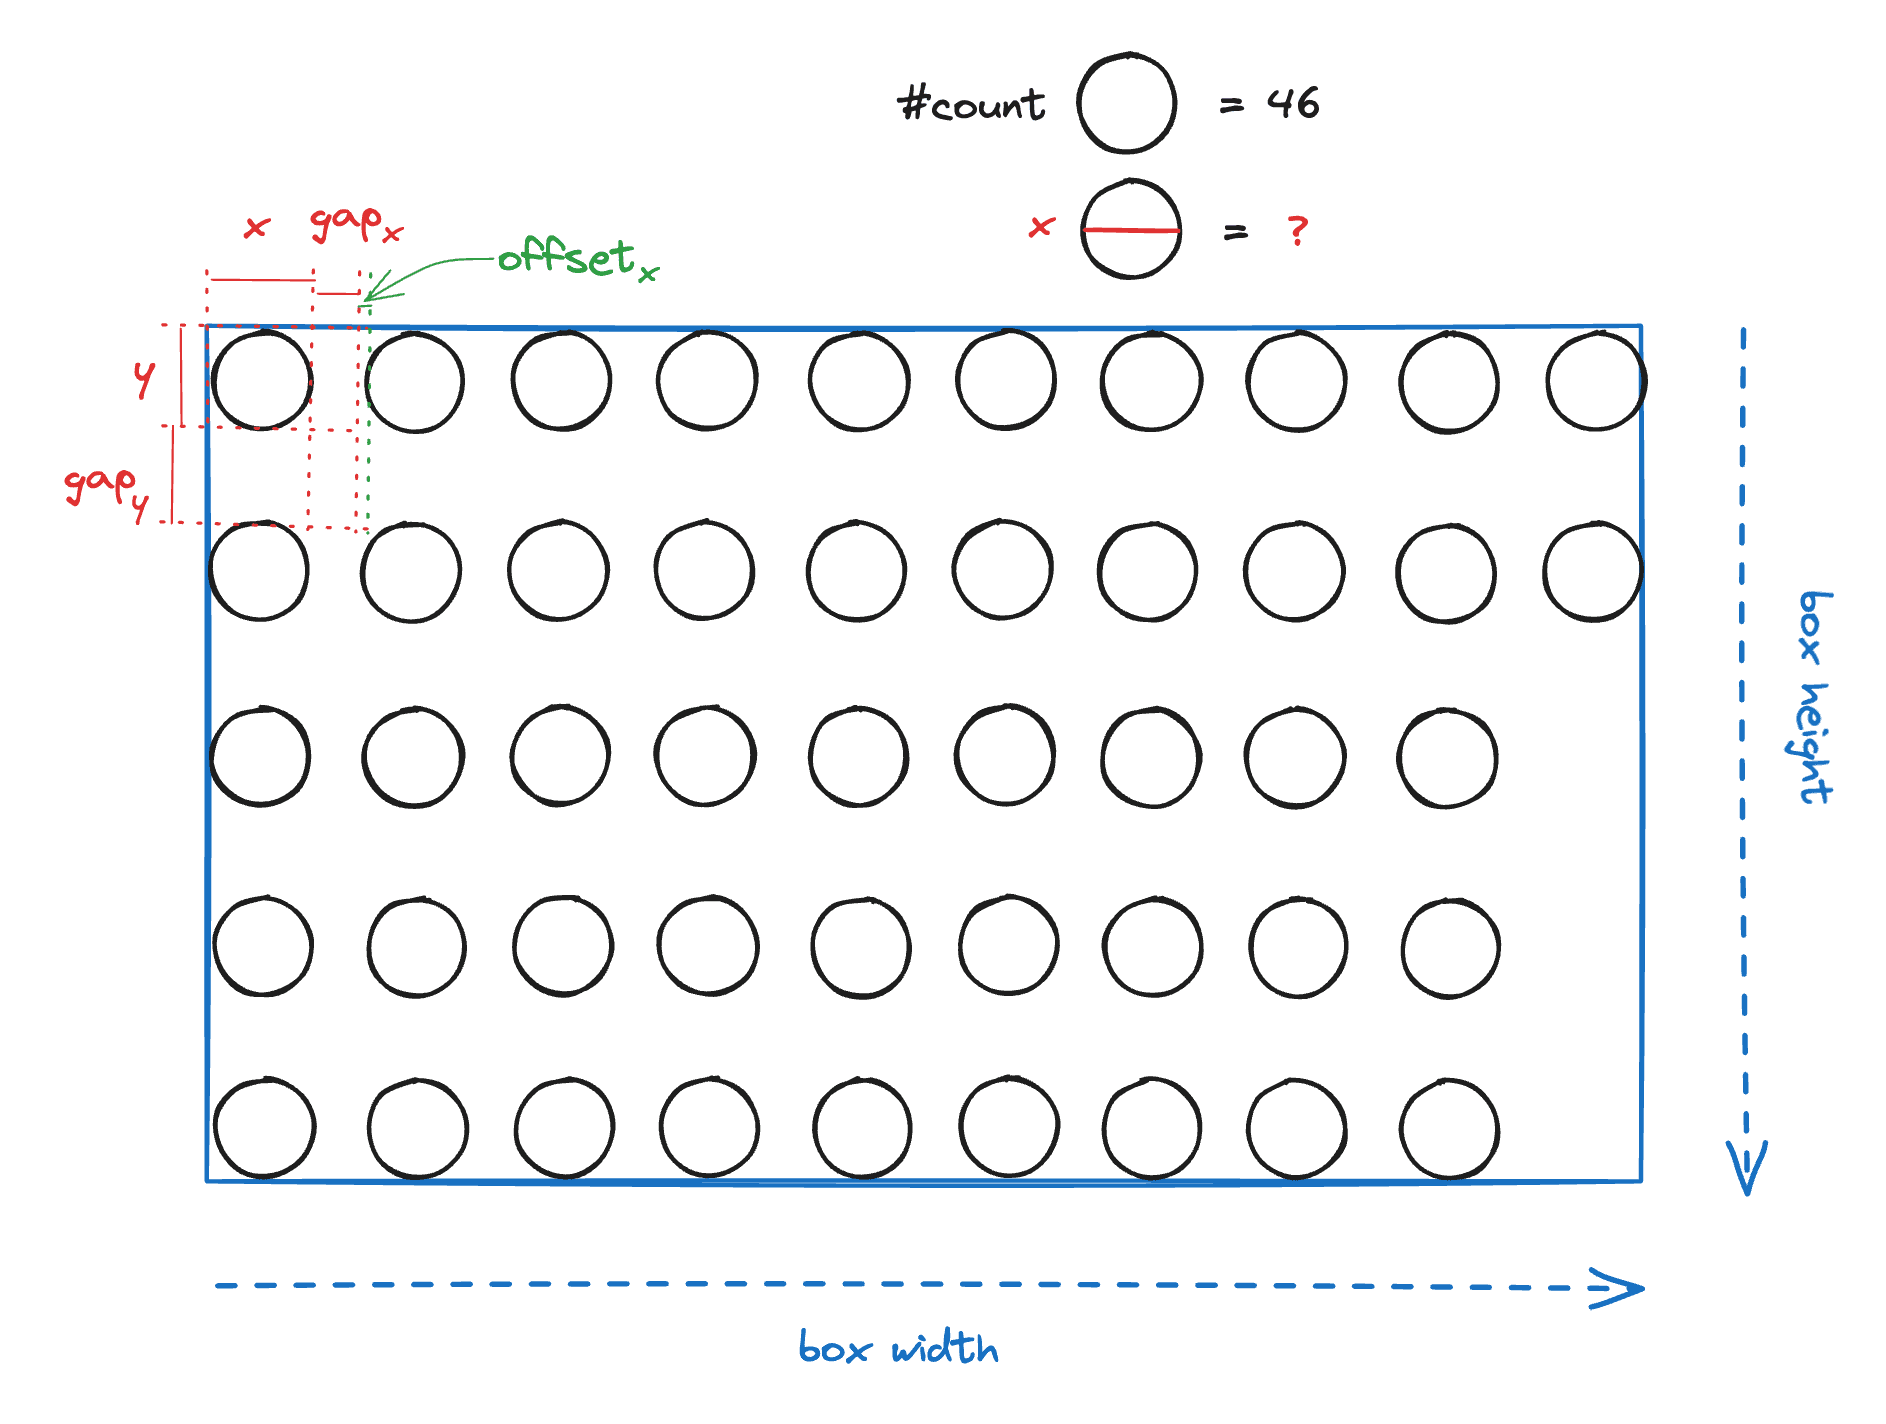
Problem Definition with Offset
Therefore, our goal is not only to calculate the width and height of the units, but also to make as small as possible.
Why we don't need
Theoretically, we can have and this make the algorithm more complex. But in practice, we make that is always 0. and use to solve the issue that sometimes the gap cannot be exactly we defined.
The proof of the algorithm
The constraints
By the previous definition, we can get the following equations:
The previous three equations are all the constraints of the problem. Therefore, our goal is to solve them and make as small as possible.
If we find the value of one of and , we know how to put the units into the box. Then we can calculate , , and .
Find range of
From the equation (1), we can get
Let's define the aspect ratio of the units that
Combine the equation (2) and inequality (4), we can get
Please note that is a positive integer, so the inequality (5) should be stricter as:
Where is a small number in range of to make sure is an integer.
Combine this with the inequality (3), we can get the following equation:
Because
Inequality (8) is a looser constraint compared to inequality (7), which means the solution (the range of ) of inequality (7) should be a subset of the solution of inequality (8).
Because we do not know , to solve inequality (7), the only way is to solve inequality (8) first, which can narrow down the range of .
To solve (8), only is a unknown variable and all other variables are constants. And from equation (2), we can transfer to function of .
Substituting this expression into the inequality (8), we finally can get the inequality for :
Now, we can find the roots of the previous cubic equation.
Obviously, there is a root . And the other two roots can be found by solving the following quadratic equation:
The two roots are:
Note that , so . Therefore
Therefore, the two roots are on the left side and the right side of 0. Also because , we can draw the cubic function:
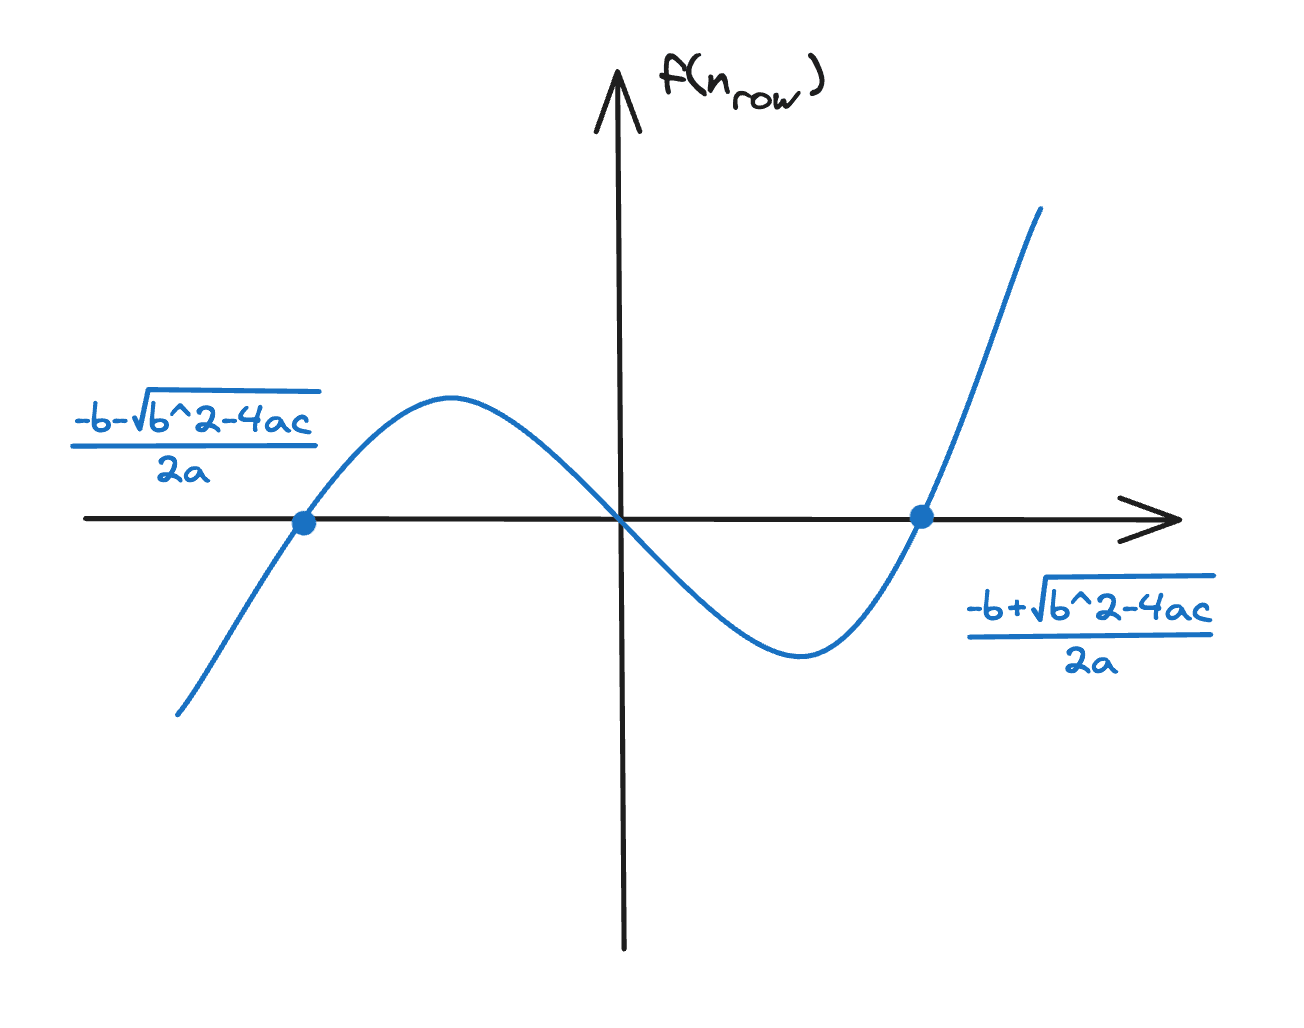
The cubic function
Because and is a positive integer.
Here is the code for finding the lower bound of :
1function getMinNRow(2 box: [number, number],3 aspectRatio: number,4 gapRatio: [number, number],5 n: number6): number {7 const [w, h] = box;8 const a = Math.pow(w * (1 + gap[1]), 2);9 const b = gap[0] * aspectRatio * h - w * gap[1];10 const c = -n * h * aspectRatio * (1 + gapRatio[0]) * (1 + gapRatio[1]);11 const delta = Math.sqrt(b * b - 4 * a * c);12 return Math.ceil((-b + delta) / (2 * a));13}
Find exact
Because is only the solution for the inequality (8), which means the satisfying this condition may not be the solution for the inequality (7). We still need to find the solution for the inequality (7) that minimize .
The idea to find the best that minimize is to
- Enumerate all possible from the lower bound.
- For each , we can calculate the and .
- Test if . If so, we find the best and return.
This means the first that satisfies this condition is the best . (Think about why)
Here is the code for finding the best :
1function getLayout(2 minNRow: number,3 count: number,4 box: [number, number]5 aspectRatio: number,6 gapRatio: [number, number]7) {8 const [w, h] = box;910 let NRow = minNRow;11 let NCol;12 let x;13 let y;14 let totalWidth;1516 do {17 y = h / (NRow * (1 + gapRatio[1]) - gapRatio[1]);18 x = aspectRatio * y;19 NCol = Math.ceil(count / NRow);20 totalWidth = NCol * x + (NCol - 1) * gapRatio[0] * x;21 } while (totalWidth > w && NRow++);2223 return { NRow, NCol, y, x };24}
Calculate the offset
After we get {NRow, NCol, y, x} by function getLayout, we can calculate the offset by:
The edge cases
If and the algorithm returns , we should not use the offset and gap to position the units. Instead, we just put all units in a single column with equal space between each other.